I did this for my birthday(4th June) and I wasn’t sure if was happy with them so I just never got around to posting them. But on my Watermelon NOTDRoxanne mentioned she’d love to see my interpretation of cupcake nails so, here you go :) There are thousands of different cupcake tutorials and interpretations out there this is just my take on cupcake nails, and they are definitely growing on me!
What do you think? Hope you’ve enjoyed!! x
P.S sorry for not being able to reply to a lot of my comments on emails, exams are steady taking over my life but my last on is next Tuesday so things should be back to normal soon!
This is another little post dedicated to achieving the cutest nails possible, this time I’m venturing into the fruit department with watermelon nails! This is just as simple as my strawberry nails, which are super easy to do but looks pretty impressive :)
1. Apply a red base (I love Revlon red by Revlon as you only need one coat!) 2. Swipe on a white line like a French manicure (Barry M White) 3. Do a line of green at the top of the nail (Barry M Spring green) 4. To finish just dot on either white or black dots - done! Hope you’ve enjoyed!! x P.S If you ever do any of these looks I’d love to see (a few people have already emailed me some pictures letting me see so if you can I’d love to have a look!!)
This is one of the cutest nail art looks I think I’ve done so I couldn’t wait to share it with you! Little owls :)
A lot of people mention when I do these posts that they don’t have the patience for looks like this, but I always do my nails while doing college work or something like that so my nails get plenty of time to dry and it doesn’t feel like I’m waiting for ever! Hope you enjoyed!! x
(This is just a quick little post, but I've got a few prewritten ones to go up over the next few weeks so hopefully there shouldn't be a gap in posts because of exams!)
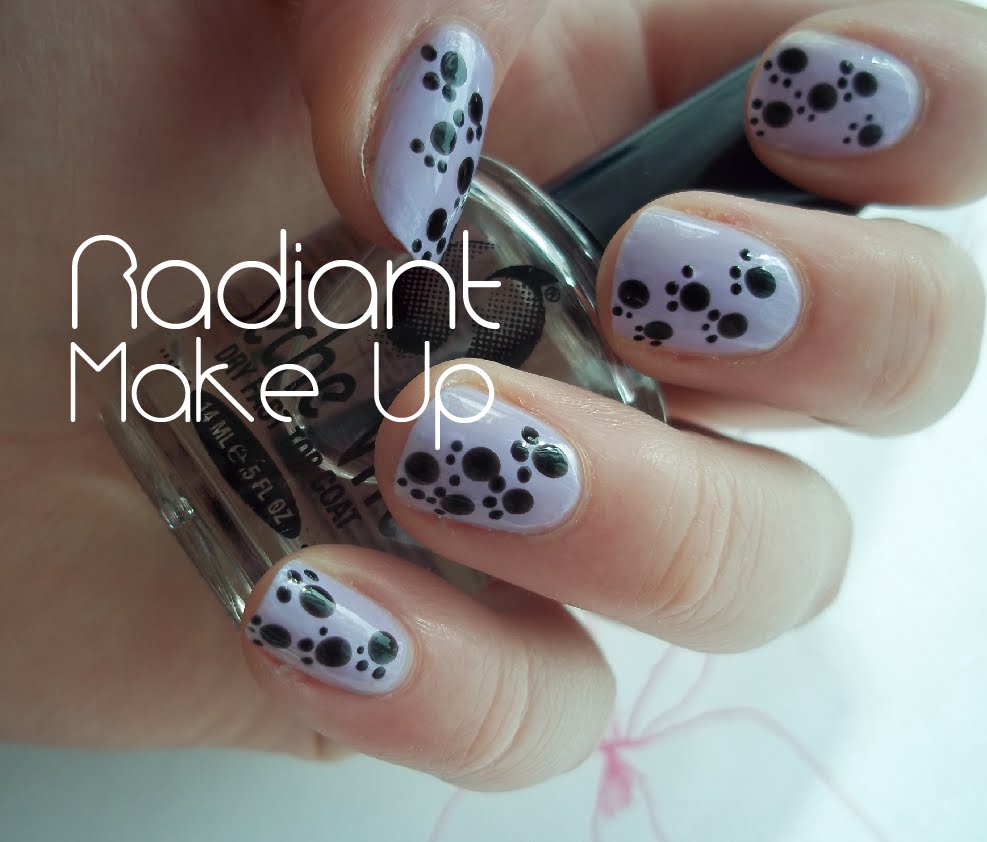
I’ve been meaning to do this look for a while and the other day after applying a coat of OPI’s Rumple’s wiggin’ I thought it was the perfect colour to do some paw prints across :) I really love it, it’s cute and actually really simple as it’s just lots of little black dots! If you want to recreate this look simply paint your nails what ever colour you prefer (think this looks best of pastels as it just makes the look really sweet) then apply medium sized dots where you want the paw prints to be.. (these will be the soles or pads!) Then try and do three smaller dots at the top of each circle to get your finished paw print!
I wouldn’t recommend doing paw prints all over the nails just because that might be too much and a little tip – take your time with these dots!
Will any of you be trying this look out?? Hope you’ve enjoyed!! x

 There are thousands of different cupcake tutorials and interpretations out there this is just my take on cupcake nails, and they are definitely growing on me!